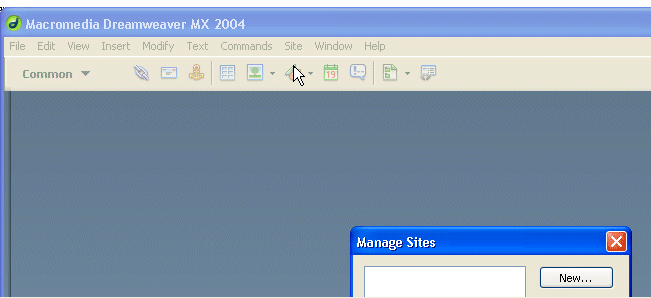
Lanch Dreamweaver on your PC.
Use the menu at the top and select SITE, then select MANGE SITES.
Click NEW SITE
Name your site anything, like myWebSite
ok now click on the ADVANCED TAB

You should see Local info and Remote info now. Local info is where your website files reside on you PC, that is why it is called local. Remote info is the info on your server account here.
You should already see your site name filled in. Press on the icon to the right of Local root folder and find where your website files are on your PC. If it is an existing website, choose that existing folder. If it is a new website, create a new folder. Do the same with the default images folder. (Note that only you will know where your local PC files are).
For http:// address enter your domain name you registered with us. IE if your domain is rabbit.com, you would enter http://rabbit.com
Ok your local info is now defined. Now click on the REMOTE INFO tab.

Select REMOTE INFO
Set Access to mode FTP
FTP HOST: Will be your domain name minus any http://www. Ie if your domain name is rabbit.com then that is all you enter here. Do not enter www.
Host Directory: For all Cpanel enabled accounts enter public_html/
make sure to include the backslash /
Username: Enter your master FTP username as stated in your welcome email
Password: Enter your master FTP password as stated in your welecome email
Click on SAVE PASSWORD so you don't have to re-enter it
Passive transfers: click this box ON (if you have connection troubles you can try clicking it off).
Firewall: You usually leave this checked off
SFTP: You usually leave this checked off
Checkin and checkout: Use this option if you only want altered files to transfer to the server. Leave it off if you want the entire site to transfer each time.
Click on test to test your logon. If it does not work, try tweaing your Passive and Firewall settings.
If it works of press OK at the bottom of the page to exit this page.

Ok now click on DONE and your project should appear in the RIGHT SIDEBAR of DreamWeaver as shown below.

You have successfully setup Dreamweaver to connect with the server. If you run into any problems please contact support and we will assist you.
Ok now how do I FTP my webfiles to the Server?
In the right sidebar, shown above. Select your project, IE myWebSite.
Now click on the first PLUG icon (it is the little blue PLUG icon just to the left of the circular arrow icon.
If you get a POP-UP screen at this point requesting local or remote info then you did not correctly configure your connection. Repeat the steps at the start of this page. Assuming you do not get that pop-up page, Dreamweaver should now connect.
If you get no connection errors continue.

You should not be connected to the server.
To view the files on the remote server connect on the icon shown above,
This should open a view of the local server (your PC on the right) and the server (on the left).

Assuming you have not transfered files yet, or you have added or edited files, the remote side will not look like the local side. You need to SYNC your files so the PC looks like the server.
Click on SITE -> SYNCHRONIZE
You can then choose to SYNC specific files you highlighted in the file menu above or all of the files.

If you want to send ALL files from your PC to the SERVER select Put newer files to remote.
If you want to send ALL files from the server to your PC select put newer files to local.
Be careful of the DELETE REMOTE FILES option. If selected it usually will delete
files that do not appear on on side or the other.
Click Preview
Click OK
Your PC and server should be in SYNC
You can also move just one file by selecting it in the sidebar menu and pressing on the UP or DOWN
arrows.