Our DialzipTM dialup network is compatible
with all Windows operating systems. Windows XP (all versions Pro
and Home) uses a Wizard type device to make an internet connection and
is a little different from other versions of Windows. To setup your
account properly you should be familiar with the dialup protocols of your
operating system.
Please note that you must have an ISDN modem to
connect via ISDN mode and any normal modem will do for 56K or less connections.
Although we do not sell modems directly we do recommend several modem
vendors who often have specials.
Setup for Windows XP (all
versions Pro and Home):
1.) The steps listed here will allow you to configure Dial-Up Networking
(DUN) under Windows XP. This will allow you to connect to us without the
need for any additional third party software.
To begin, left click on your Start button, move your mouse so
that Control Panel is highlighted, and then left click to select
it. You will now be in the control panel.
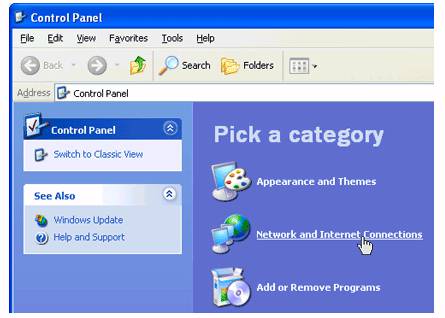
2.) Double click on the option for Network and Internet Connections
(see above).
3.) You will be asked to pick a task. You want to set up an internet
connection, so double click on the option marked Set up or change your
Internet connection.
The Internet Properties window should now be displayed (pictured
below).
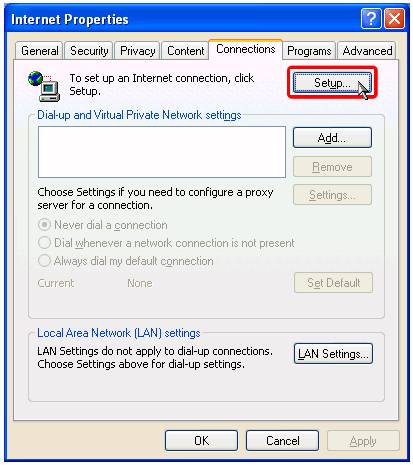
4.) Make sure you are in the connections tab and then click on setup.
You should now be in the New Connection Wizard which will guide you through
the rest of the process. Click on Next.
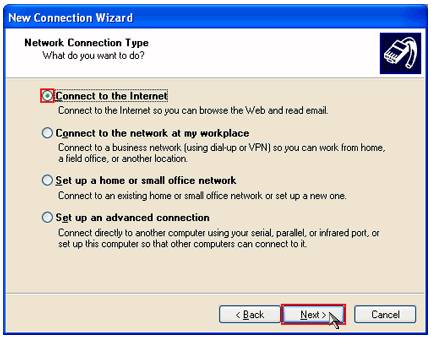
5.) Make sure connect to the internet is checked (see above)
and click on next again.
6.) On the next screen, designated as GETTING READY, click on the Setup
Connection Manually checkbox and click on next again.
7.) On the next screen, designated INTERNET CONNECTION, click on Connect
Using A Dialup Modem and click on next again.
8.) On the next screen it will ask you for your ISP's name. Type
WEBster and click on next.
9.) Now you will be asked to enter your phone number. This is
not your home phone number, this is the phone number you will use to dialup
that you got from our dialup number lists. (Note: To test what to
put here, goto a telephone and try dialing the number by hand. If
you hear a modem on the other end you will be sure that you have the right
combination to connect).
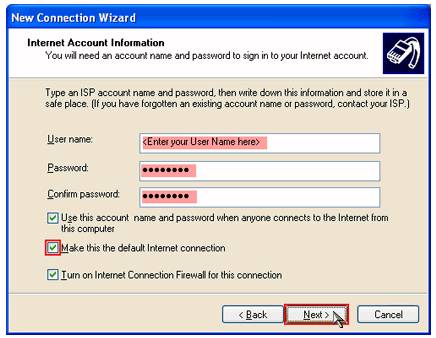
10.) If you have followed the steps above correctly so far, you will be
at the account information screen (shown above). Enter the logon
username we gave you on your signup email exactly as well as your password.
Pay special attention to upper and lower case: they matter. Make
sure the "make this the default internet connection" option is checked.
The other two options are up to you.
11.) Click on next. You will be taken to the COMPLETED screen.
Here you may want to ask the system to create a link on the desktop.
In any event, click on FINISH.
12.) One more step. Goto the Start button, select the CONNECT
TO icon, and move to the WEBster connection you just created
so that it is highlighted. While it is highlighted, RIGHT click
on it and a few options will pop up. Select the properties
tab.
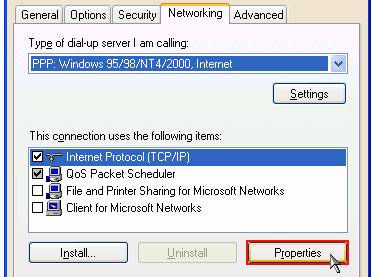
13.) On the WEBster Properties screen, select networking. You
should see a list of items, as shown above. Make sure the Internet
Protocol option is checked, then highlight it and click on
properties.
14.) You will be taken to the internet protocol properties page.
Make sure both the OBTAIN IP AUTOMATICALLY and OBTAIN DNS AUTOMATICALLY
options are checked and then click ok. (note: if you have
an ISDN connection, try these settings first. If you have problems,
contact us for your DNS entries).